

Inspired, I decided to updated this old metal art I had purchased from Marshalls a year ago into something more suitable for my current taste.
Before:

After:

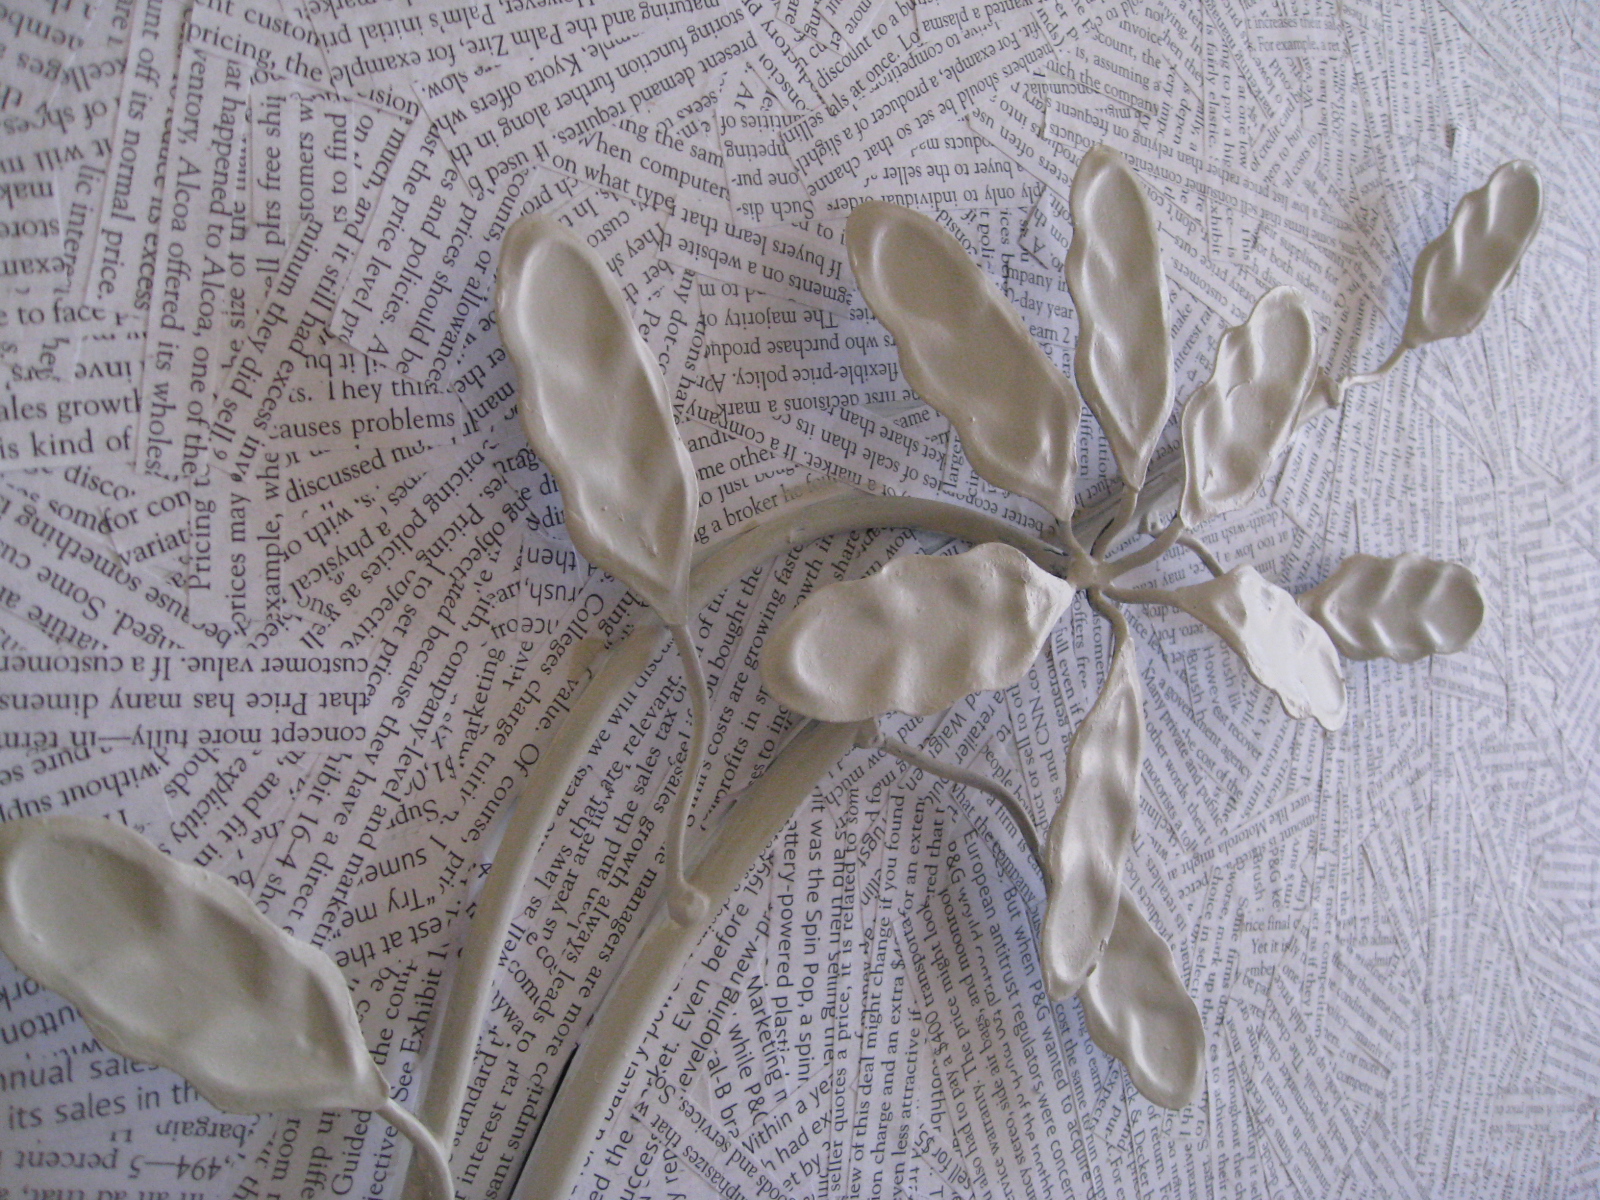
Close up
Read on to find out how I did this super simple makeover!
First, I wiped down the surface of the metal with a wet cloth and then applied a layer of white primer to the background to create an easier surface to glue on. The white color also helps to keep the glued on paper whiter looking. It's okay if it looks messy since it's gonna be covered up anyways. Then I painted the floral design a pale gray. I used some leftover Martha Stewart Living in Sharkey Gray from my DIY upholstered bed project. It's in eggshell but looks glossy because the paint is still wet.

Next, I cut up a bunch of small strips from old photocopies of my Marketing textbook from college since that's what I had on hand. Feel free to substitute other printed paper such as newspapers. Most of my pieces where either 2 or 3 lines of text wide and between 3 to 5 inches long.

Then I made my own Modge Podge by watering down some washable white school glue using 1 part glue to 1 part water. Afterwards, I glued all of the pieces down in a random pattern going around the floral detail which is actually 3D. I found it best to paint the glue on the backside of the paper strips before pasting it down. It's a bit smoother that way. After gluing down each small section and allowing the glue to dry a bit, I added a topcoat of my makeshift Modge Podge to seal down the strips. The white school glue will dry clear.

For the edges, I folded the strips of paper over to the backside for full side coverage since the sides are visible. I added a bit of clear packing tape to the pieces that wouldn't glue down flat. The glue didn't stick as well to the bare metal as it did on the primed metal.

After a few
Materials:
- something to cover
- paint
- primer (if you have it on hand, otherwise just use light colored paint)
- small paintbrush
- white school glue (like Elmer's)
- lots of paper with text such as old newspapers, just make sure the ink doesn't smudge when applying glue on top
- scissors
I'm pretty happy with the way it turned out and that I gave a second life to some old wall decor I otherwise would have thrown out for the low price of $0.99 which is how much I paid for the glue. I had everything else on hand.
Let me know if you try this yourself! I'd love to see it. :)
Until next time,
Trinh
No comments:
Post a Comment