
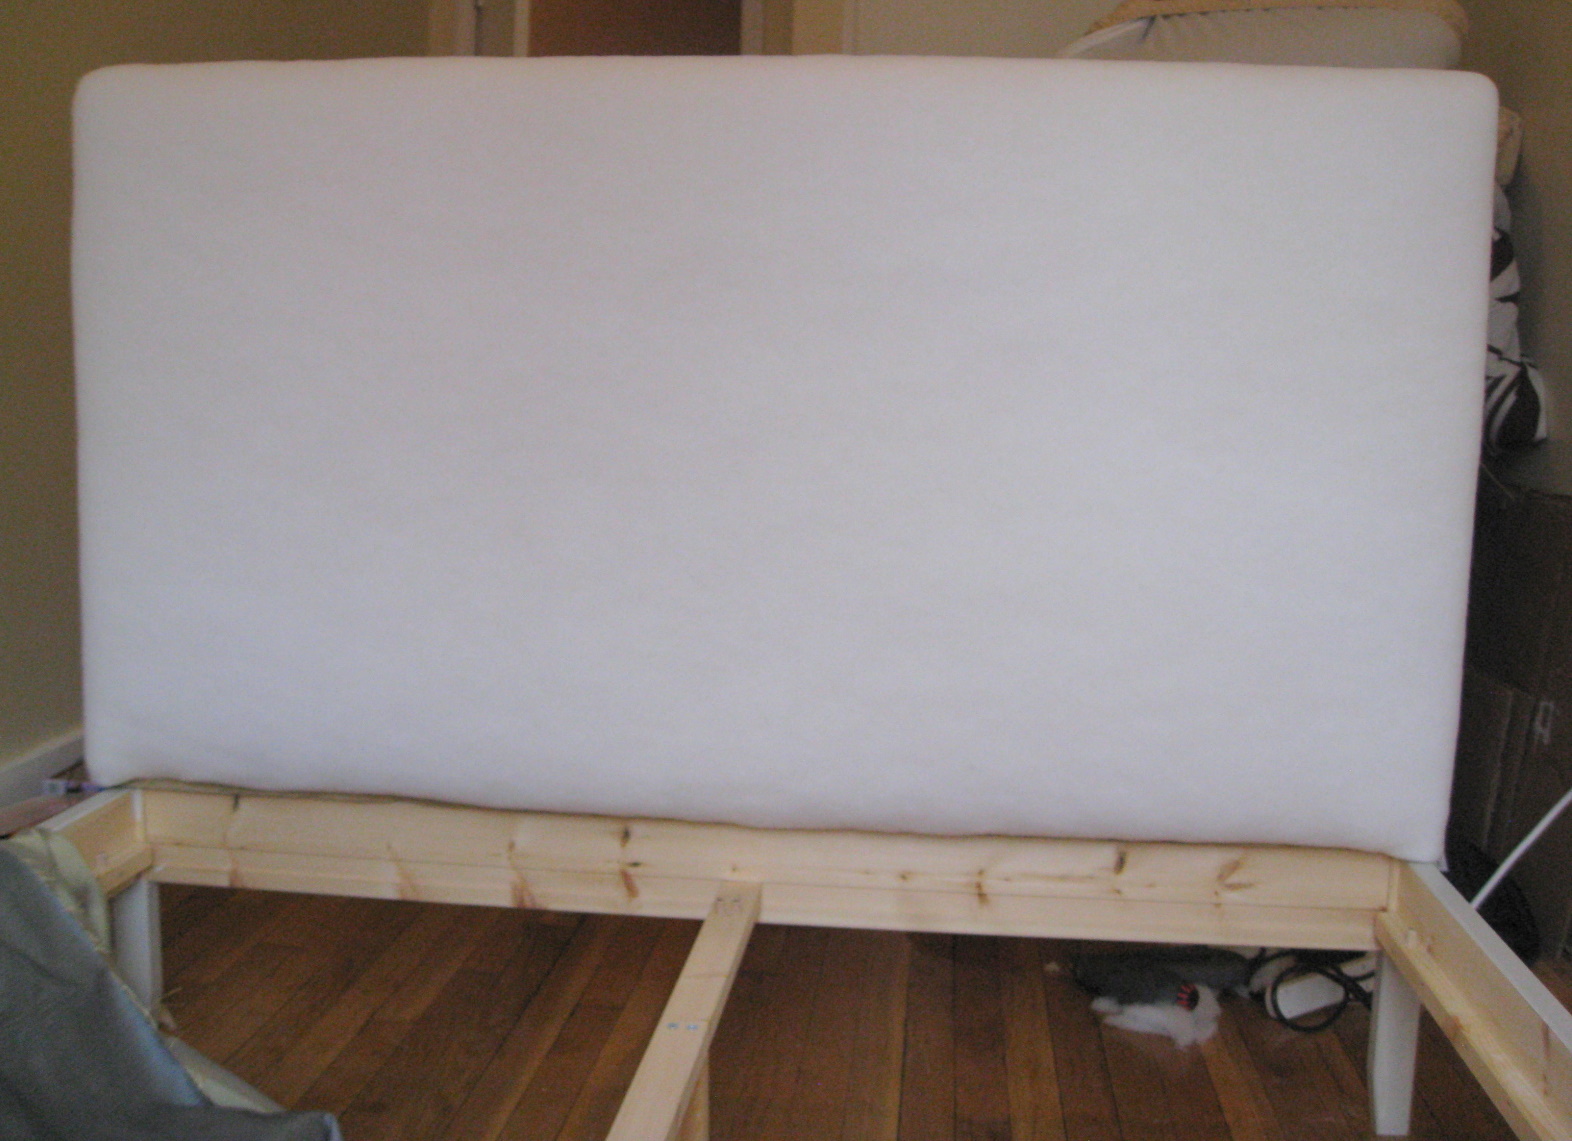
So after a long weekend of hardwork, I finally made my bed go from this:

Taken at night with artificial lights so everything is extra yellow. Notice how "rustic" the bedframe looks.
To this:

Natural lighting makes my room look so much prettier :)
I was inspired by Daniel Kanter from Manhattan Nest who shared his great tutorial on how he took his Fjellse bedframe and made it look awesome like this. He even has it paired with crisp white covers which is what I'm really digging at the moment too. It's so sleek, clean and modern with a masculine touch thanks to the dark wool upholstery and square lines.

Inspired by his approach to the Fjellse and his great tutorial on building up height on the headboard which I used, and bored with the plain wood look, I decided to tackle my own Ikea hack.
Read on if you're curious about how I transformed my bed.
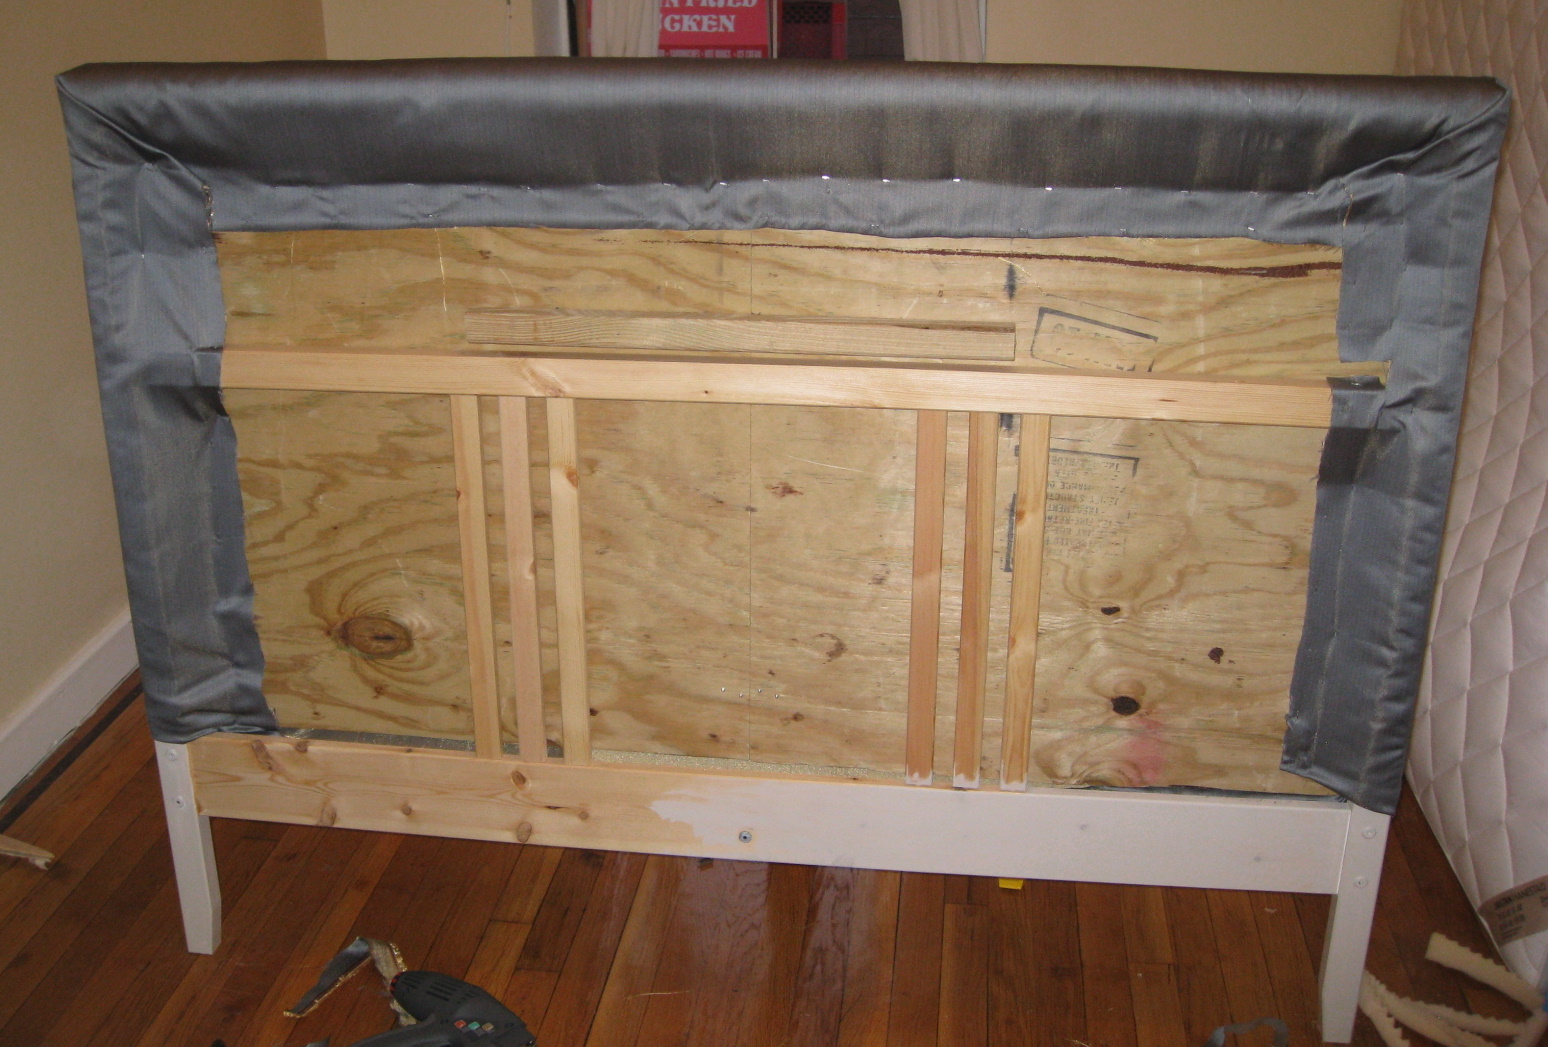
Here's a before shot of the bedframe. Notice the 2 pieces of plywood to the side? That's going to turn into a headboard. Funny story on why it's in 2 pieces instead of one nice long piece. I couldn't figure out how to secure it onto the roof of my roommate's car and it was too big to fit into the backseat despite my Tetris moves. :( So I had to improvise and get it sliced into two pieces to fit into the backseat. So if you're car-less and rely on public transit, rest assured it's possible to get materials home to DIY.

First step is to prime and paint the parts of the bedframe that will be exposed. I primed with 2 layers of Zinnser water-based primer in the blue can, applying heavily on the knotted areas of the pine to cover them more. I decided to use water-based primer instead of oil-based because I live in a tiny apartment and fumes would be an issue considering I'd have to sleep there too. Also, the Home Depot I went to didn't have the Zinnser odorless oil-based primer I wanted. Then I noticed that a lot of the knotted areas had little grooves in them. So I went ahead and applied some wood filler (the paintable kind) and sanded the spots smooth. In hindsight, filling in the grooves before priming would have been better.
Knots before priming and filling.

After priming and applying wood filler.

Next, I applied two coats of Martha Stewart Living latex paint in the color Sharkey Gray with an eggshell finish. It's a nice light grey color that's neutral enough to match with just about anything.
*Tip: Wrap your brush in a plastic sandwich bag between coats so the paint on the bristles don't dry out and it's ready to go for the next coat.

In regards to visible screws on the bedframe, I opted to paint over them to blend the black screwheads into the rest of my bedframe. However, if you're more concerned about being able to take the bed apart later without needing to touch up the paint, I'd recommend going the extra step and painting under the screwheads. I skipped applying polycrylic but feel free to do so if you want more durability.


Drill pilot holes and screw the pieces together like so. I used 2" screws leftover from my closet shelf installation and screwed one in on each side. I also added some wood glue between the joints for a stronger frame.

Next, I attached the frame to the piece of plywood making sure to first drill pilot holes to prevent the wood from splitting. I used one screw every 10 inches or so.

If you were unable to get the plywood in one piece, go ahead and attach some leftover wood to join the two pieces together. Because of how the Fjellse headboard is constructed, make sure you don't attach the strip of wood below the dashed line in my picture. This will make more sense when you see the assembled frame from the back. I choose to use wood glue in addition to screws but the wood glue isn't really necessary.

Once you're done with that, attach this to the headboard of the Fjellse bedframe by screwing along the dashed lines below. Since my plywood was in two pieces, I had a gap which I easily fixed by attaching a mending plate.


Then I used a mending plate on each side to reinforce the joint between the original Fjellse headboard and my add on. This made my new frame decently sturdy.

Now the frame is ready to be upholstered! I opted for a very padded look since I intend to add buttons for a plush tufted look later. If you're set on using nailhead trim, I'd advise to stick with using 2-4 layers of quilter's batting instead of thick foam since it'll be much easier to attach nailhead trim. I used a doubled over foam mattress pad I bought from a discount store for $12.50 in a full/queen size. Fold it over so the smooth side is facing out for a nice smooth look.

Using a staple gun, attach the foam along the back of the headboard stapling every 5 or 6 inches. I used an electric staple gun from Arrow that is supposed to be heavy duty but I had a hard time driving the staples flush with the board. I ended up hammering a lot of staples flush.

Then go back and add more staples so that it's attached at every 2 or 3 inches. This will give you a nice smooth top edge when adding the fabric.

Do the same with the bottom front side. It's okay to space the staples further, about every 4 inches.

Trim off any excess foam from the sides for clean side edges.

Next, I doubled up the batting and draped it on the headboard to check how much I'd need. My batting was 60" wide so I decided to use that as the width. It's a bit short but keep in mind you'll be pulling the batting taught so it ended up working fine for me.

In an effort to make the headboard look more finished and easier to swap out fabric, I decided to try to minimize the look of staples in the bottom front. So I unfolded the batting and stapled the center onto the bottom of the plywood.

Next, I folded the batting back up and pulled taughtly like below while stapling the batting to the top back of the headboard into the plywood. I stapled every 2 inches, sometimes less. Do the same for the sides leaving a few inches near the corners for last.

For the corners, trim off some excess batting to create a cleaner, less bulking corner.

Fold the corner down like wrapping a package. Be sure to staple it securely.

When you're done, it'll look something like this.

Notice how clean the bottom edge looks in the front? That'll make it easier in case you ever want to change the fabric out since you won't have to worry about damaging all of the batting and foam when you're ripping out staples.
Next, start draping your fabric to determine placement. This is especially important if you're using a fabric with a print. My fabric is a subtly striped dark grayish-blue with a sheen so it was very necessary to get the vertical stripes perfectly vertical using a level. I used a couple of temporary staples to hold the top edge in place and some painter's tape on the sides to figure out placement.

Once everything was level to my liking, I started with a couple of staples on the center of the frontside of the headboard right into the bedframe. I folded up the edge for a nicer looking bottom. Then I did the same for the top back. Make any adjustments if it's not level.

Continue stapling the fabric onto the headboard making sure to pull the fabric taught like when attaching the batting. For the bottom edge that wraps around the sides, try to fold the fabric until you get a straight line on the bottom.

Save the corners for last. To make neat corners, carefully tuck and fold the fabric. Add lots of staples so it's secure.


Trim off any excess fabric from the back. When you're done, it should look something like this:

Now you're done! :)

Materials:
- 1/2" thick plywood cut to dimensions of desired headboard ~ $4 from Home Depot scrap pile
- 1 1/4" x 1 1/4" strip of wood cut into 3 pieces to build frame add on ~ $2
- 2 2" wood screws (had already)
- 2 12 packs of 1 1/4" wood screws ~ $4
- 2-3 mending plates (packages usually come with screws) ~ $3
- foam mattress topper in full/queen size ~ $12.50
- 2 yards of batting (will depend on the width of your batting) ~$10
- 1 1/2-2 yards of fabric for upholstery (depends on width of roll) ~ $15
- primer (water or oil-based) ~$13
- paint (a sample size is plenty) ~ $3
- 2 foam brushes ~ $2
- wood glue ~ $3
- wood filler ~ $3
- fine sanding paper ~$3
- staples ~$4
Total ~ $81 Not super low but the primer, paint sample, wood glue, wood filler, sanding paper, and staples are all things that'll go towards future projects and are things you might already have on hand if you're a DIYer.
- staple gun ~$30 (I bought an electric one but I'd recommend a manual. Cheap electric ones don't have enough power for properly stapling through wood)
- power drill (had already)
- drill bit & screw set (had already)
- hammer (because my electric stapler sucked for this task)
The tealight scones came from Target a year ago when I bought it to hang in the entry way of my old apartment. So far, I'm pretty happy with the way my new bedroom is turning out. :)
Let me know if you try this yourself. I'd love to check it out. :)
Until next time,
Trinh
Really good tutorial. I think you could post it in Instructables, many people search there for this kind of thing.
ReplyDeleteBookmarked for when I get the tie and energy to attack my bed ;)
Thanks for the idea of posting this on Instructables, I'll get to it soon. Also, if you ever get around to DIYing your bed, I'd love to see pics. :)
ReplyDeletethe bed looks awesome! hard to believe it is the same!
ReplyDeleteYou did a really good job, congrats!
what a pity I just bought an (expensive) upholstered bedframe!
otherwise I would have copied your hack.
Cheers
Love the result and the effort put in this was really worth it. I live in Paris and look forward to doing the same with my cheap Ikea bed. Merci :-)
ReplyDeleteThanks Natalia and Quentin!
ReplyDeleteQuentin, please send me pics when you do it! I'd love to see it.
Beautiful. I think I'll be putting this to good use since I need to stage a home for resale. Just one additional idea. I think I may just put an initial cover of muslin on this project. Then I can make a "slip cover". I bit more time and expense, but it will allow me to change the decor much more easily. I may even get "seasonal" after the move!
ReplyDeleteI wish I had your skills. I’m not sure if I am this talented to build it though it might be worth a try.
ReplyDelete